
Manage students with ease.
Track event attendance.
Customize to your liking.

nustracker is a desktop application for NUS event directors and student leaders of student organizations in NUS School of Computing to manage students and events.
As an event director and student leader, you will be able to add students and events into nustracker and use it to keep track of event attendance, blacklist students, etc. These are just some of the features and there will be more to come in the future. nustracker is customized to your needs—simple, intuitive, and easy to pick up.
All these things can be done through a simple and intuitive Command Line Interface (CLI), whilst being complimented by a detailed and elegant interface.
This document will guide you through on how to start using nustracker.
You might see text formatted within colored boxes, so here’s a quick run-through on what they mean:
Example (this is also an actual tip!):
Let's get started with nustracker!
Table of contents
- Getting Started
- Features
- General Layout
- Basics of nustracker
- Commands Section
- Student Commands
- Event Commands
- Other Commands
- Customization
- Misc
- FAQ
- Command summary
Getting Started
For macOS users: Please start the .jar file via the terminal (see: step 5 below). If you do not, the files may not be created due to current macOS security restrictions on file creation.
For Windows users: It is also recommended that the .jar be started via the terminal as well (but double-clicking should work fine).
You finally have your hands on nustracker. Great! Let’s learn how to use it now.
-
Ensure you have
Java 11or above installed in your Computer. -
Download the latest
[CS2103T-T11-1][nustracker].jar, found under Releases. -
Move the jar file to a folder of your choice. We recommended something easy to type, like
myfolder. - For Windows Users (macOS users see Step 5)
- Double-click the jar file.
- Double-click the jar file.
- For macOS Users:
- Open Terminal.
- Navigate to the home folder created in Step 3 using the terminal. For example, if your folder was created in Desktop and is called
myfolder, you would typecd /Desktop/myfolder/to move to that folder. For more information, check: Go to a folder by entering its pathname. - Type the following command into the Terminal:
java -jar [CS2103T-T11-1][nustracker].jar.
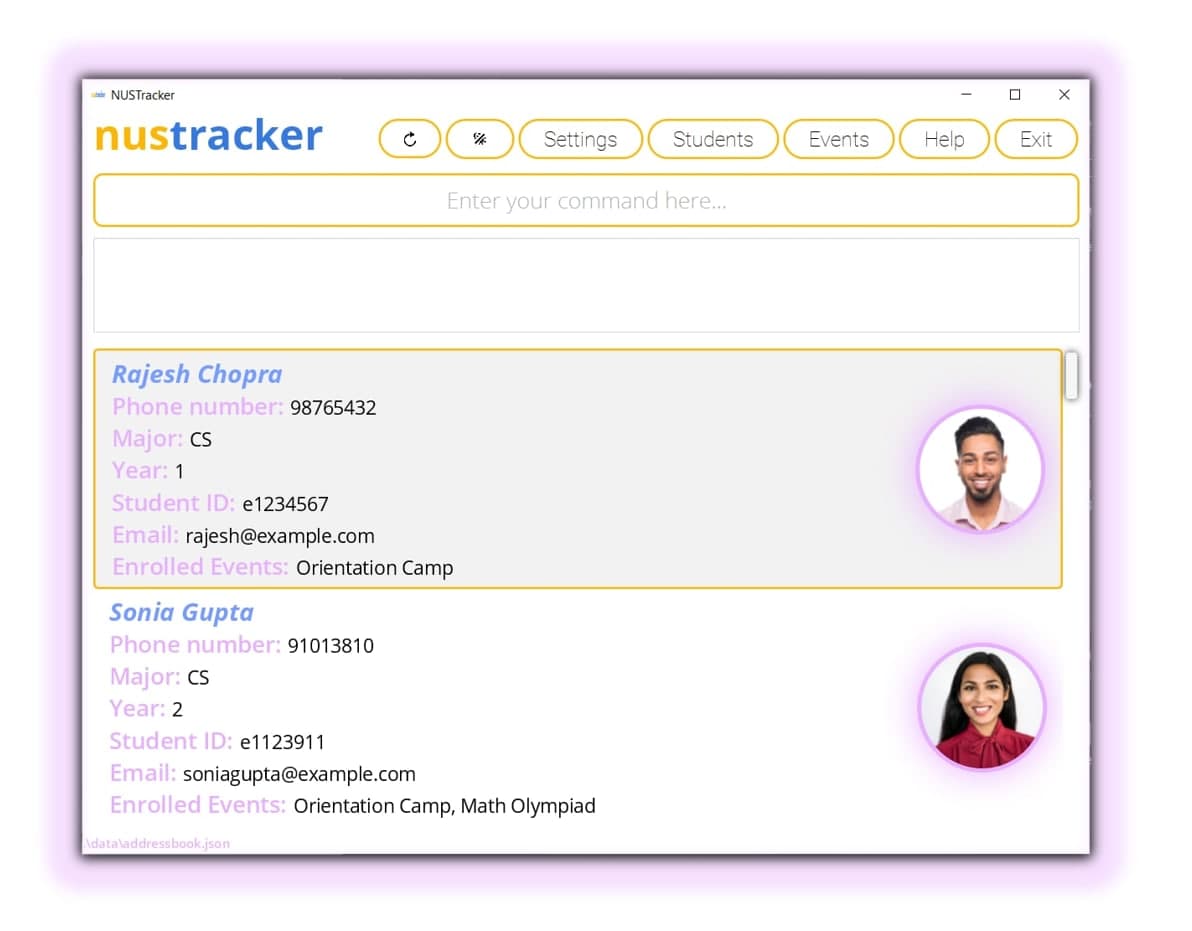
- You should see the following (minus the profile pictures):
profile-pictures.zip from the link in step 2 and unzip it in myfolder.
nustracker is now up and running on your system!
For getting started, we suggest this flow:
If you are an experienced CLI user, you can jump straight to the Command Summary.
Get ready for an unprecedented overhaul in student and event management using nustracker!
Features
nustracker was designed to help the average overworked university student, who also has many important responsibilities outside the curriculum in clubs and societies—specifically student and event management.
What can nustracker do?
-
Keep track of students
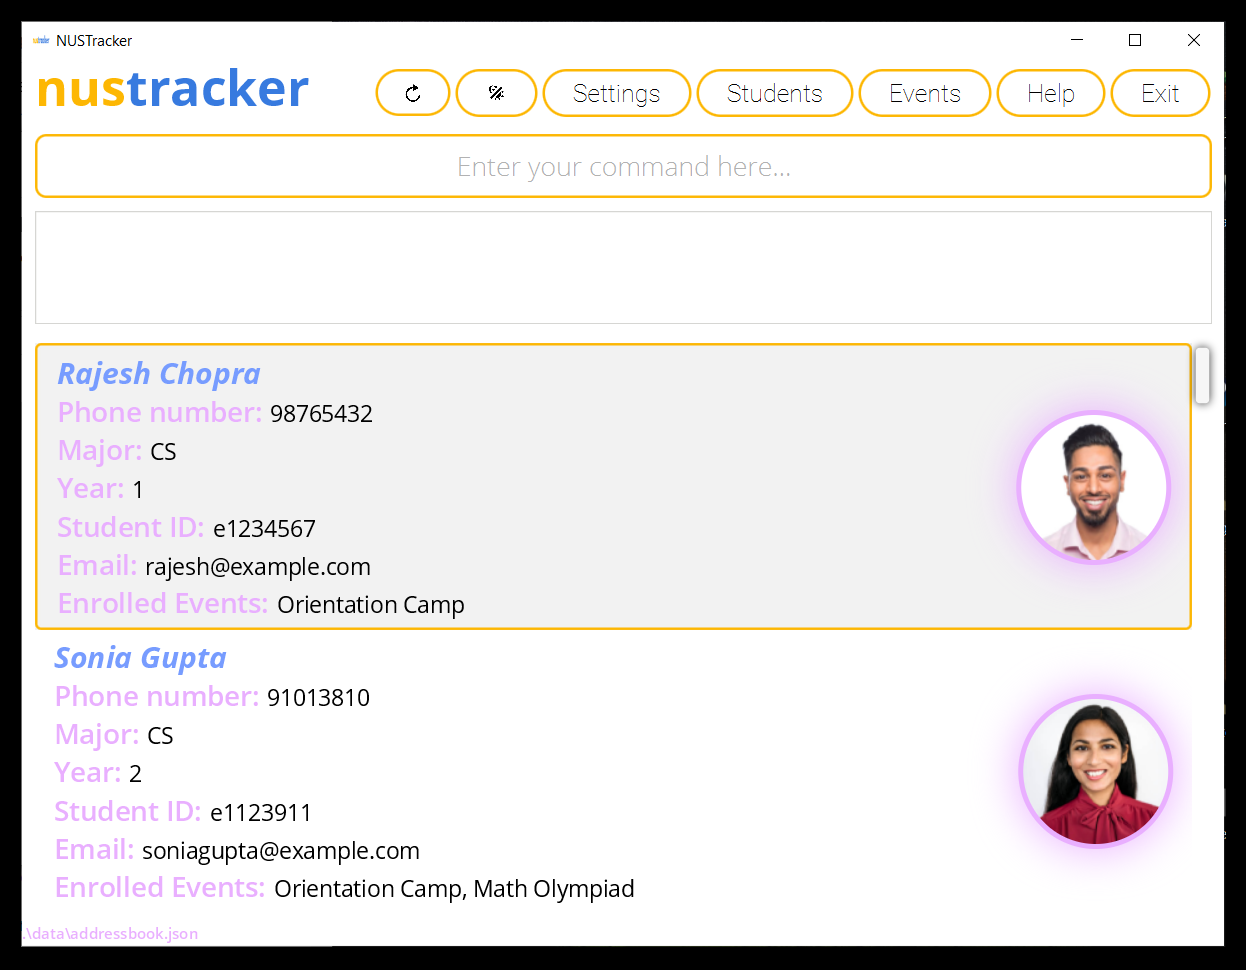
nustracker displays all students currently associated with the organization neatly. The students have their details and a profile picture (optional) listed with them as well, allowing quick and convenient access to student particulars.
-
Keep tracks of events and event attendance
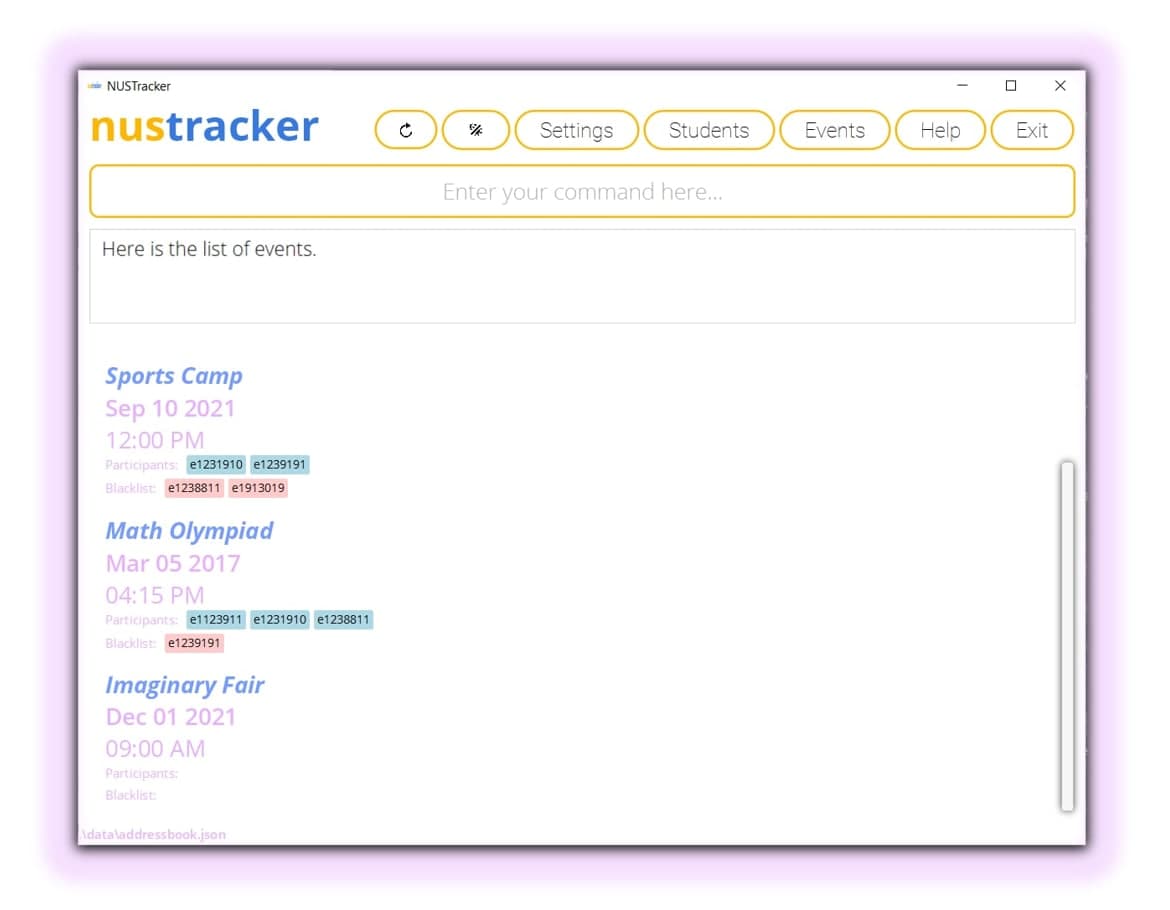
nustracker can also display the events stored, their information, and the participants taking part in those events.
-
Keep track of event blacklists
Events often have blacklists, which can also be managed using nustracker.
-
Be customized to the your liking
One of the key points of nustracker is its customization. For more information, see Customization.
General Layout
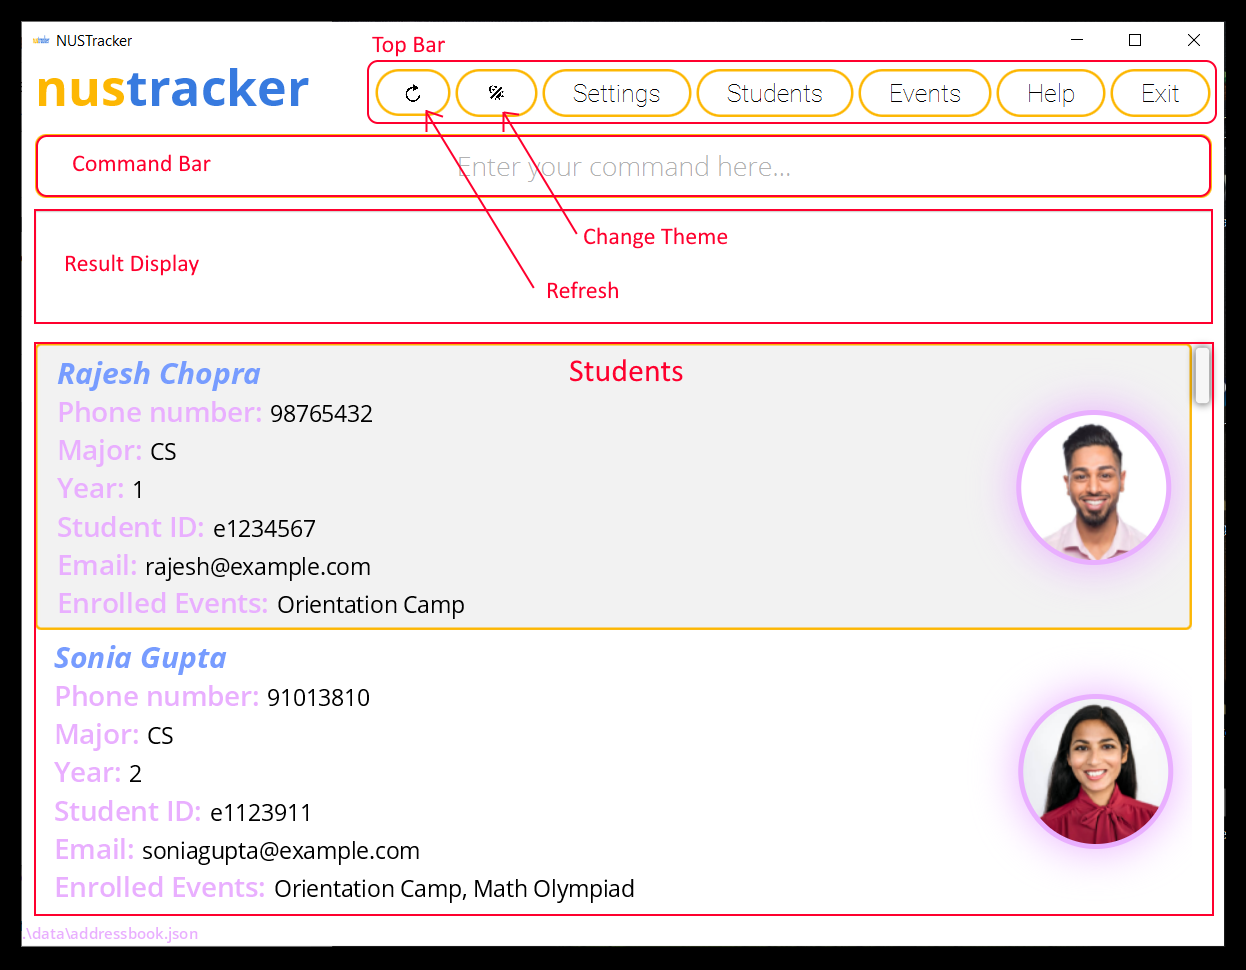
The following is a description of the general layout of nustracker.
-
Top bar
-
Refresh
Refreshes the currently displayed students/events. Press this button when you add profile pictures. -
Toggle Theme
Toggles the theme of nustracker, from Dark theme to Light theme, and vice versa. -
Settings
Opens the Settings Window. -
Students
Displays current students. -
Events
Displays current events. -
Help
Opens the Help window. -
Exit
Exit nustracker.
-
-
Command bar
This space is for you to type in your commands. For more information about commands, either check out our step-by-step guide or the commands section.
-
Result Display
The empty box directly below the command bar is the result display, where error/success messages are displayed.
-
Students
The students, their information, and the events they are taking part in are displayed here.
Basics of nustracker
We hope you are excited to learn the basics of nustracker!
But, before we do anything, let’s learn how to use a Command Line Interface (CLI). CLI is a command line program that accepts text input to execute different actions. In other words, all you have to do to use nustracker is to type a command in the command bar, and press enter.
Now for the premise. Imagine that you are the manpower executive of a newly-formed NUS society called the Imaginary Society (very creative we know).
It plans on holding a fair—appropriately titled the Imaginary Fair—on the 1st of December 2021, at 9am.
Here are the particulars of our first member and participant:
Name: Sae Byeok
 Phone number: 87438007
Major: CS
Year: 1
Student ID: e1111111
Email: saebyeok@example.com
Wants to join: Imaginary Fair
Adding your first student
Okay, now that we know who our first member is, let’s add her as a student to nustracker.
To add her, we are going to use the add command, which follows the format:
add n/STUDENT_NAME m/MAJOR id/STUDENT_ID y/YEAR p/PHONE e/EMAIL
So, in the case of Sae Byeok, her fields would be:
-
STUDENT_NAME: Sae Byeok -
MAJOR: CS -
STUDENT_ID: e1111111 -
YEAR: 1 -
PHONE: 87438007 -
EMAIL: saebyeok@example.com
MAJOR can come before STUDENT_NAME.
Using the fields above, type this into the command bar: add n/Sae Byeok m/CS id/e1111111 y/1 p/87438007 e/saebyeok@example.com and press Enter.
After entering the command and pressing Enter, scroll all the way down using the scrollbar on the right to view your newly added student! nustracker should look like this:
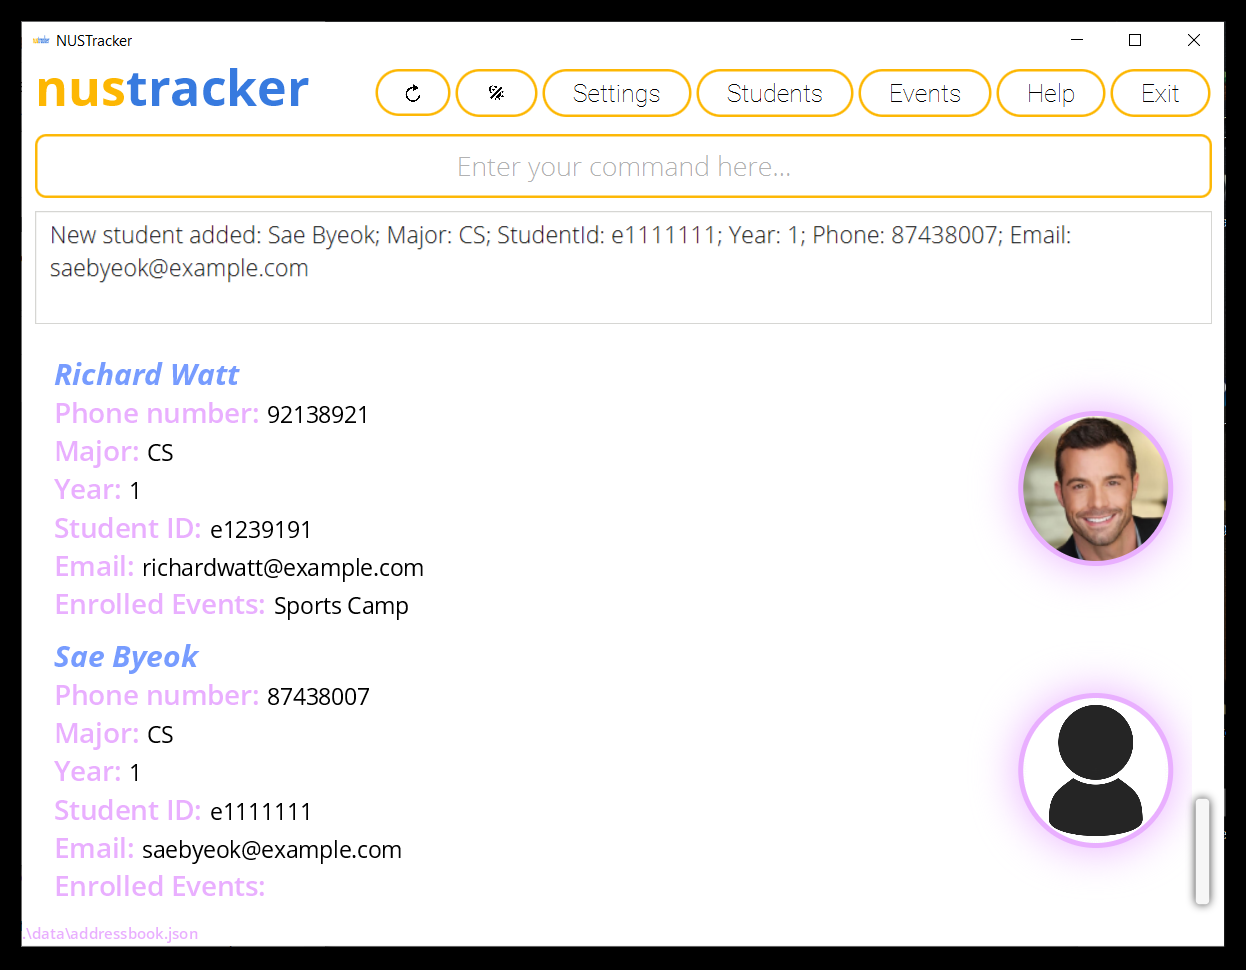
Congratulations! You have just added your first student! Next, we will learn how to create an event and eventually, how to add Sae Byeok as a participant!
Creating your first event
Let’s create the event Imaginary Fair to contain information about the Fair that the Imaginary Society wants to organise.
To create this event, we are going to use the create command, which follows the format: create n/EVENT_NAME d/EVENT_DATE t/EVENT_TIME.
So, in the case of Imaginary Fair, the fields would be:
-
EVENT_NAME: Imaginary Fair -
EVENT_DATE (DD-MM-YYYY): 01-12-2021 -
EVENT_TIME (24 Hour Time): 0900
Using the fields above, type this into the command bar: create n/Imaginary Fair d/01-12-2021 t/0900 and press Enter.
Let’s take a look at the newly created event. To make nustracker show the current list of events, either press the Events button in the top bar, or type events into the command bar and press Enter. (If you are unsure about the buttons, refer here.) Then scroll down using the scrollbar on the right.
If done right, nustracker should look like this:
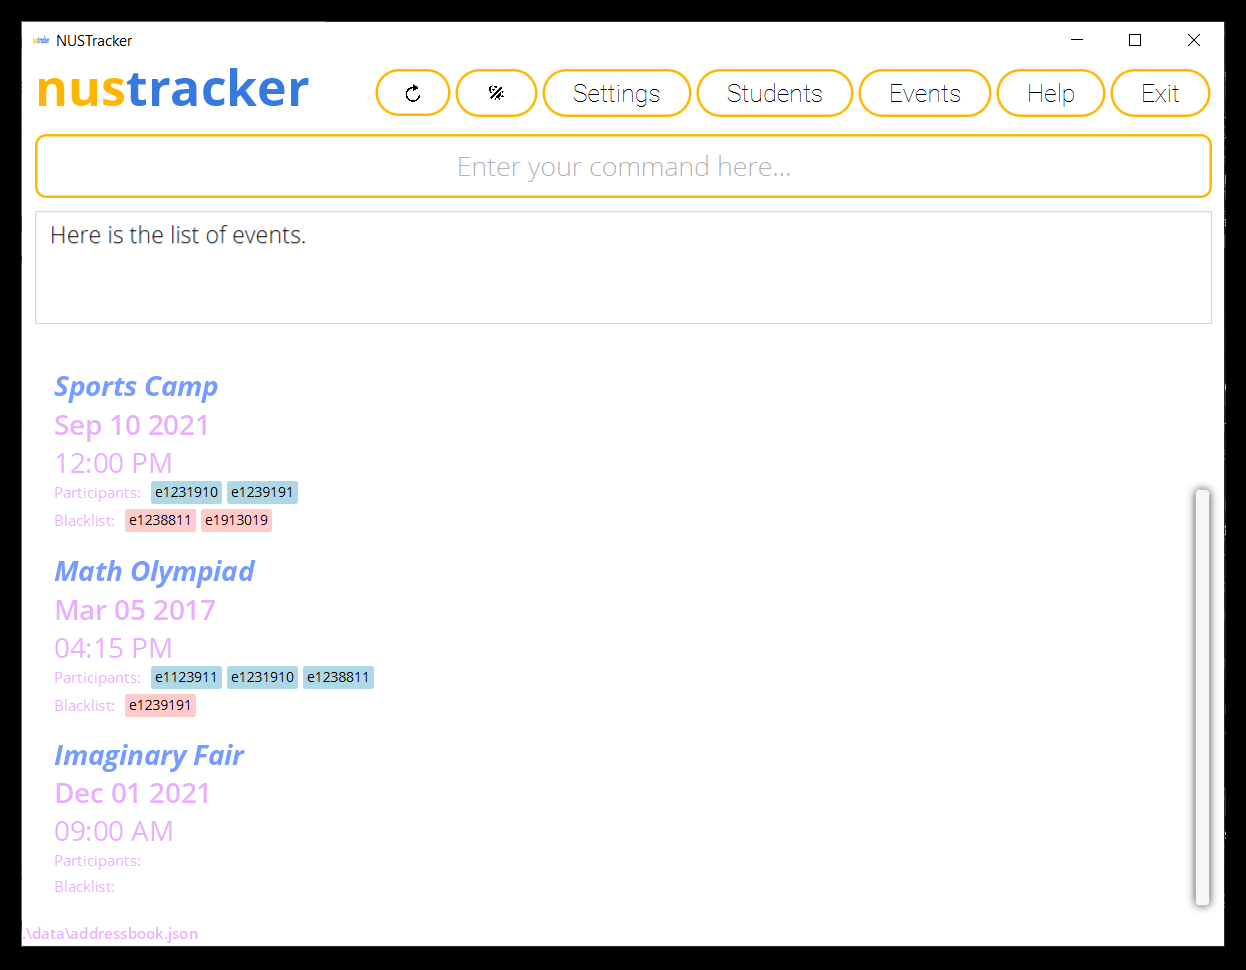
Congratulations! You have now created an event in nustracker as well!
Enrolling your first student into your first event
Previously, you had added Sae Byeok as a student, and created the Imaginary Fair event. Let’s enroll her into the Imaginary Fair as a participant.
In order to do this, we will make use of the enroll command: enroll id/STUDENT_ID ev/EVENT.
So, in the case of Sae Byeok and the Imaginary Fair, it would be:
-
STUDENT_ID: e1111111 -
EVENT: Imaginary Fair
Using the fields above, type this into the command bar: enroll id/e1111111 ev/Imaginary Fair and press Enter.
If done correctly, this change should be reflected in both the Imaginary Fair’s details and Sae Byeok’s particulars.
 Under Participants, there is a participant with the Student ID
 e111111, which corresponds to Sae Byeok
To make nustracker go back to the students list, either press the Students button in the top bar, or type students into the command bar and press Enter.
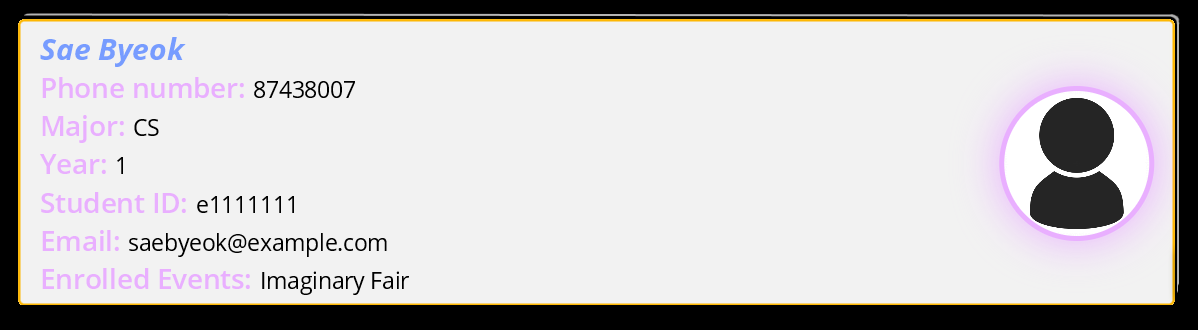
Under Enrolled Events, we can see that Sae Byeok is enrolled in the Imaginary Fair
Congratulations! You have reached the end of this very brief tutorial where you learnt how to add your first student, create your first event, as well as enrolling students into an event! But remember, nustracker is much more powerful than this!
You can:
- Edit Sae Byeok’s details
- Delete events
- Blacklist students
- Export the emails of a list of students
- Add profile pictures
- And much much more!
For a more comprehensive list of commands, please refer to the sections below or take a look at the Command summary.
You’re on your way to becoming an nustracker pro!
Commands Section
![]() Notes about the command format:
Notes about the command format:
-
Words in
UPPER_CASEare the parameters to be supplied by you.
e.g. inadd n/NAME,NAMEis a parameter which can be used asadd n/John Doe. -
Items in square brackets are optional.
e.g.n/NAME [m/MAJOR]can be used asn/John Doe m/CSor asn/John Doe. -
Items with
… after them can be used multiple times including zero times.
e.g.[y/YEAR]…can be used asy/1,y/ 1 2 3etc. -
Parameters can be in any order.
e.g. if the command specifiesn/NAME p/PHONE,p/PHONE n/NAMEis also acceptable. -
If a parameter is expected only once in the command, but you specified it multiple times, only the last occurrence of the parameter will be taken.
e.g. if you specifyp/12341234 p/56785678, onlyp/56785678will be taken. -
Extraneous parameters for commands that do not take in parameters (such as
help,students,events, andexit) will be ignored.
e.g. if the command specifieshelp 123, it will be interpreted ashelp. -
Commands that take in parameters cannot contain extraneous prefixes nor slashes. This means none of the input parameters should contain any slashes, since slashes are used to identify prefixes.
-
If a command is entered with the correct prefixes but multiple inputs to the prefixes are not accepted, the error message shown would be based on the leftmost invalid prefix parameter in the command’s command format.
Student Commands
- Adding a student
- Listing all students
- Editing a student
- Deleting a student
- Filtering students
- Delete shown students
- Blacklisting students
- Whitelisting students
Adding a student: add
Adds a student to nustracker
Command: add n/STUDENT_NAME m/MAJOR id/STUDENT_ID y/YEAR p/PHONE e/EMAIL
Formatting:
- Student name:
- Does not need to be unique
- Can only contain alphanumerical characters and spaces
- Major is to be specified via acronyms. The following acronyms are valid:
- CS (Computer Science)
- BZA (Business Analytics)
- IS (Information Systems)
- ISEC (Information Security)
- Student ID:
- Must be specified exactly as the letter e, followed by 7 numbers (eXXXXXXX)
- Must be unique
- Year must be a number from 1 to 6 inclusive
- Phone:
- Must be unique
- Have length of 3 - 20 numbers inclusive
- Email:
- Must be unique
- Must be in the
local-part@domainformat -
local-part:- Should only contain alphanumeric characters and these special characters:
+ _ . - - The special characters cannot be used consecutively
- Cannot be blank
- Should only contain alphanumeric characters and these special characters:
-
domain:- Made up of domain labels separated by periods
- Must end with a domain label at least 2 characters long
- Starts and ends with alphanumeric characters
- Consists of alphanumeric characters, separated only by hyphens, if any
- Examples of valid emails:
PeterJack_1190@example.coma@bcpeter_jack@very-very-very-long-example.comif.you.dream.it_you.can.do.it@example.coma1+be.d@example1.com
Examples:
add n/John Doe m/CS id/e7474831 y/2 p/81631293 e/JohnDoe99@example.comadd n/Melissa Chong m/ISEC id/e3434827 y/5 p/90025837 e/MelissaChongxx@example.com
Listing all students: students
Shows all students in nustracker.
This command essentially removes any filters that have been applied with the filter command.
This command has the same function as clicking the students button in the top bar.
Command: students
Editing a student : edit
Edits an existing student in nustracker.
Command: edit id/ID_OF_STUDENT_TO_EDIT [n/NEW_NAME] [m/NEW_MAJOR] [id/NEW_STUDENT_ID] [y/NEW_YEAR] [p/NEW_PHONE] [e/NEW_EMAIL]
- Edits the student who currently has the specified student ID.
- At least one of the optional fields must be provided.
- Existing values will be updated to the input values.
- Events of a student cannot be directly edited with the
editcommand, please make use of theenrollandremovecommands for this purpose.
Examples:
-
edit id/e0322322 p/91234567 e/johndoe@example.comedits the phone number and email of the student with student IDe0322322to be91234567andjohndoe@example.comrespectively. -
edit id/e0542341 n/Betsy Crower id/e0543212edits the name and student ID of the student with student IDe0542341to beBetsy Crowerande0543212respectively.
Deleting a student : delete
Deletes the specified student from nustracker.
Command: delete id/STUDENT_ID
- Deletes the student with the specified
STUDENT_ID.
Examples:
-
delete id/e1234567deletes the student with the student IDe1234567. -
delete id/e0589162deletes the student with the student IDe0589162.
delete.However,
delete will delete either a student or an event and cannot contain both student and event prefixes at once.i.e.
delete id/STUDENT_ID ev/EVENT_NAME is not allowed. (Refer to Deleting an event for more information.)
Filtering students: filter
Filters students whose data contains the given field.
Command: filter [id/STUDENT_ID [MORE_STUDENT_IDs]...] [n/STUDENT_NAME [MORE_STUDENT_NAMES]...] [m/MAJOR [MORE_MAJORS]...] [y/YEAR [MORE_YEARS]...] [ev/EVENT_NAME]
- You can filter by:
- Multiple student IDs.
- Multiple student names.
- Multiple majors.
- Multiple years.
- A single event name.
- This command can only be used when nustracker is showing the Student list.
- You can only filter by one field (i.e. filter only by student ID, student name, year, major, or event name).
- You have to filter by at least 1 parameter (simply typing
filterwill not work) - The search is case-insensitive. e.g.
n/johnwill match withn/JOHN. - You can search using multiple keywords except for events.
- You can search by partial keywords for names. e.g.
n/alwill match withn/alice
Examples:
-
filter id/e1234567returns the student with the ID e1234567 if that student exists in nustracker. -
filter id/e1234567 e2345678returns two students whose student IDs are e1234567 and e2345678 if they exist in nustracker. -
filter n/Johnreturns the students whose names contain John. -
filter n/John alicereturns the students whose names contain John OR Alice. -
filter m/CS ISreturns the students majoring in CS or IS. -
filter y/1 2 3returns the students in years 1, 2, or 3. -
filter ev/orientationreturns a list of students who are tagged to the Orientation event.
Coming soon: Filter by phone number.
Coming soon: Filter by multiple fields.
Deleting displayed students : delfiltered
Deletes all currently displayed students. This is typically used after a filter command to delete students based on a certain criteria.
Command: delfiltered
delfiltered, all the students currently in nustracker will be deleted since all of them are shown.
- This command can only be used when nustracker is showing the Student list.
- After all the filtered students are deleted, the remaining students would then all be shown in the list, if any.
- At least one student needs to be shown in the filtered list for
delfilteredto work.
Examples:
-
filter y/4followed bydelfilteredwill delete all students who are in Year 4. -
filter ev/Graduation 2021followed bydelfilteredwill delete all students that have attended the Graduation Ceremony in 2021.
Blacklisting students: blacklist
Blacklists students from an event. Blacklisted students will not be allowed to enroll into the events they are blacklisted from.
Command: blacklist id/STUDENT_ID ev/EVENT_NAME
- Student ID need not exist in the database.
- Event name has to exist in the database.
- Student ID cannot be enrolled in event.
- Use the remove command to un-enroll the student ID before running the
blacklistcommand.
- Use the remove command to un-enroll the student ID before running the
Examples:
-
blacklist id/e1234567 ev/Orientation Campblacklists the student ID e1234567 from the Orientation Camp event. -
blacklist id/e0000000 ev/Sports Campblacklists the student ID e0000000 from the Sports Camp event.
Whitelisting students: whitelist
Whitelists students from an event. Whitelisted students are removed from an event’s blacklist.
Command: whitelist id/STUDENT_ID ev/EVENT_NAME
- Student ID needs to be in the event’s blacklist.
- Event name has to exist in the database.
Examples:
-
whitelist id/e1234567 ev/Orientation Campremoves the student ID e1234567 from the Orientation Camp event’s blacklist. -
whitelist id/e0000000 ev/Sports Campremoves the student ID e0000000 from the Sports Camp event’s blacklist.
Event Commands
- Creating an event
- Listing all events
- Enrolling a student in an event
- Removing a student from an event
- Deleting an event
Creating an event: create
Adds an event to nustracker.
Command: create n/EVENT_NAME d/EVENT_DATE t/EVENT_TIME
- Event name cannot be empty.
- Event name cannot contain the slash character as slashes are used to identify prefixes.
-
The event name you choose must be unqiue and not already exist in the events list.
- Event date has to be in the format
DD-MM-YYYY.- DD represents the day (from 01-31 inclusive)
- A day will not be accepted if the month does not contain it.
- For example, February does not have a 29th day (unless it is a leap year) so
29-02-2021will not be accepted.
- MM represents the month (from 01-12 inclusive)
- YYYY represents the year.
- DD represents the day (from 01-31 inclusive)
- Event time has to be in 24 hour time
HHMM.- HH represents the hour (from 00-24 inclusive)
- MM represents the minute (from 00-59 inclusive)
-
Note: if HH is
24, MM has to be00. (i.e.2400)
Examples:
-
create n/Orientation Camp d/01-08-2022 t/1000creates an event with the name Orientation Camp, date 01-08-2022 or 1 August 2022, and time 1000 hrs or 10:00 am.
Listing all events : events
Shows all events in nustracker.
This command has the same function as clicking the events button in the top bar.
Format: events
Enrolling a student in an event : enroll
Enrolls the specified student into the specified event.
Command: enroll id/STUDENT_ID ev/EVENT
- Enrolls the student specified by student ID into the event specified by its event name.
- Event name is case-insensitive.
Examples:
-
enroll id/e0544111 ev/CS1101S Mock PEenrolls the specified student with student ID e0544111 into the event “CS1101S Mock PE”. -
enroll id/e0322322 ev/Orientation Campenrolls the specified student with student ID e0322322 into the event “Orientation Camp”.
Removing a student from an event : remove
Removes the specified student from the specified event.
Command: remove id/STUDENT_ID ev/EVENT
- Removes the student specified by student ID from the event specified by its event name.
- Event name is case-insensitive.
Examples:
-
remove id/e0986472 ev/Tea Making Workshopremoves the student with student ID e0986472 from the event “Tea Making Workshop”. -
remove id/e0264853 ev/Fun Runremoves the student with student ID e0264853 into the event “Fun Run”.
Deleting an event : delete
Deletes an event from nustracker.
Command: delete ev/EVENT_NAME
- Deletes the event with the specified
EVENT_NAME.
Examples:
-
delete ev/Orientationdeletes the event with the nameOrientation. -
delete ev/Sports Campdeletes the event with the nameSports Camp.
delete.However,
delete will only delete either a student or an event and cannot contain both student and event prefixes at once.i.e.
delete id/STUDENT_ID ev/EVENT_NAME is not allowed. (Refer to Deleting a student for more information.)
Other Commands
- Viewing help
- Viewing the settings
- Exporting Emails
- Refreshing the main window
- Changing the theme
- Exiting the program
Viewing help : help
Opens the Help window
This command has the same function as clicking the help button in the top bar.
Command: help
Viewing the settings: settings
Opens the Settings window
This command has the same function as clicking the settings button in the top bar.
Command: settings
Exporting Emails : export
Exports the emails of the students that are currently being displayed.
Command: export fn/FILE_NAME
- Filenames cannot contain these illegal characters:
\ : * ? " < > | - Filenames cannot exceed 50 characters.
The file will be located in the data directory, which is where the app’s save files are located.
If the events list is currently being shown, export will still function and will export the emails of the most recent student list.
Examples:
export fn/StudentsAttendingOrientationexport fn/AllStudents
Refreshing the main window: refresh
Refreshes the main window. Often used to update the main window after adding profile pictures, etc.
This command has the same function as clicking the refresh button in the top bar.
Changing the theme: theme
Toggles the theme between Dark and Light theme.
This command has the same function as clicking the toggle theme button in the top bar.
Exiting the program : exit
Exits the program.
This command has the same function as clicking the exit button in the top bar.
Command: exit
Customization
- Changing between Light/Dark theme
- Setting a profile picture
- Changing the glow of the profile picture
Another key feature of nustracker is its ability to be customized greatly. This section covers how nustracker can be customized to your liking.
Changing between Light/Dark Theme
nustracker has a light/dark theme. To toggle between the two, type theme into the command bar, or click the button (to the left of Settings) as shown in the image below and voila!

Setting a profile picture
nustracker has the ability to add a profile picture to a student. Follow the steps given to add a picture:
-
If you have not started nustracker before, run nustracker within a folder of your choice.
-
Once it runs, a folder called profile-pictures is created within the folder that contains nustracker.
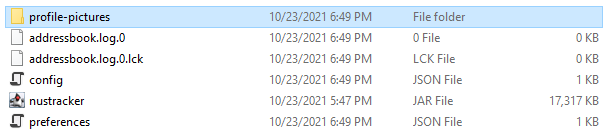
The profile-pictures folder is highlighted in blue
-
Open the profile-pictures folder and add the image you want as a profile picture. The image must be either a .png or a .jpg image.
-
Rename the image to correspond to the Student ID of the student in nustracker that will use this profile picture.
For example, let’s say there is a student in nustracker with the Student ID e1111111. You should rename the picture to e1111111 as shown below.
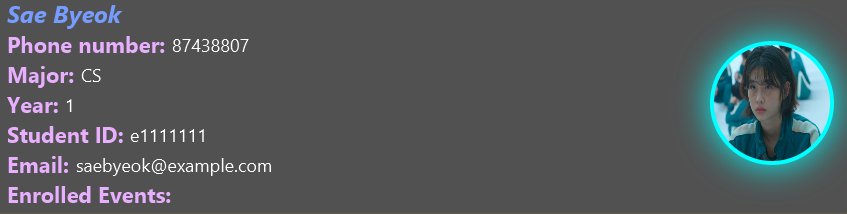
The updated information (belonging to the student with Student ID e1111111 in nustracker)
-
The profile picture will update once you type
refreshinto the command bar, click the Refresh button, or restart nustracker. -
You’re done!
Although most image sizes will work perfectly fine, the best image sizes are 120px by 120px.
Changing the glow of the profile picture border
nustracker allows you to change the color of the glow of the profile picture.
-
Open up the Settings window either by clicking the Settings button or by typing in
settingsinto the command bar. -
Click the dropdown menu, and pick a color.
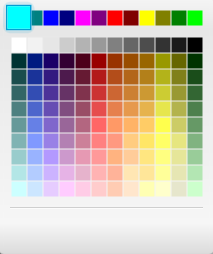
You can choose one of the pre-selected colors.
Customization FAQs
Q: I have added the image, but it does not appear.
A: Please check if:
- The image is either .jpg or .png. Other image types are NOT supported.
- You have the correct name format used—refer to point 3 of Setting a profile picture above.
- The image size is too small or too large. Due to the limitations of JavaFX, extreme image sizes cannot be displayed (more than 10 mb).
If you have exhausted all options, you can file a bug report on our GitHub page.
You have now learnt to customize nustracker to its fullest. Go ahead and play around with the settings!
Misc
Saving the data
nustracker data is saved in the hard disk automatically after executing any command that changes the data. There is no need to save manually.
The file is saved in a folder where you ran the application. If you ran the application in C:\Users\JohnDoe, the data file will be in C:\Users\JohnDoe\data and is named addressbook.json
C:\Users\JohnDoe\data is also where exported files are contained!
Editing the data file
nustracker data is saved as a JSON file. Advanced users are welcome to update data directly by editing that data file.
FAQ
Q: Is nustracker free?
A: Yes! nustracker is completely free to use.
Q: How do I transfer my data to another computer?
A: Install the app in the other computer and overwrite the empty data file it creates with the file that contains the data of your previous nustracker home folder.
Q: Is my data in nustracker secure?
A: Yes! Your data is stored locally on your computer, so it cannot be stolen unless someone has physical access to your computer.
Q: Do I need an internet connection to use nustracker?
A: No. An internet connection is not required. nustracker can work completely offline.
Q: Can I use nustracker on a mobile device?
A: Unfortunately not. nustracker is designed to work best on a desktop / laptop with the ability to make full use of the command line interface.
Q: I noticed a bug in nustracker. How do I report it?
A: We are committed to delivering a well-made software and to achieve that, every single bug report counts. To submit a bug report, please visit the issues page. Thank you for contributing to nustracker!
Command summary
Student Commands
| Command | Description | Example |
|---|---|---|
| add | Adds a student | add n/STUDENT_NAME m/MAJOR id/STUDENT_ID y/YEAR p/PHONE e/EMAIL |
| students | Lists all students | students |
| edit | Edits a student | edit id/ID_OF_STUDENT_TO_EDIT [n/NEW_NAME] [m/NEW_MAJOR] [id/NEW_STUDENT_ID] [y/NEW_YEAR] [p/NEW_PHONE] [e/NEW_EMAIL] |
| delete | Deletes a student | delete id/STUDENT_ID |
| filter | Filters by field |
filter n/STUDENT_NAME [MORE_STUDENT_NAMES]... filter id/STUDENT_ID [MORE_STUDENT_IDS]... filter m/MAJOR [MORE_MAJORS]... filter y/YEAR [MORE_YEARS]... filter ev/EVENT_NAME
|
| delfiltered | Deletes all students that are currently displayed | delfiltered |
| blacklist | Blacklists a student from attending an event | blacklist id/STUDENT_ID ev/EVENT_NAME |
| whitelist | Whitelists a student from attending an event | whitelist id/STUDENT_ID ev/EVENT_NAME |
Event Commands
| Command | Description | Example |
|---|---|---|
| create | Creates an event |
create n/EVENT_NAME d/EVENT_DATE t/EVENT_TIME Date format: DD-MM-YYYY Time format: HHMM |
| events | Lists all events | events |
| enroll | Adds a student to an event | enroll id/STUDENT_ID ev/EVENT_NAME |
| remove | Removes a student from an event | remove id/STUDENT_ID ev/EVENT_NAME |
| delete | Deletes an event | delete ev/EVENT_NAME |
Other Commands
| Command | Description | Example |
|---|---|---|
| help | Opens the help window | help |
| settings | Opens the settings window | settings |
| export | Exports the emails of the students that are currently displayed | export fn/FILE_NAME |
| refresh | Refreshes the main window | refresh |
| theme | Toggles the current theme | theme |
| exit | Exits the app | exit |